25 Spooktacular DIY Halloween Decor Ideas That’ll Leave Your Guests in Awe!
Halloween decor has me craving easy, wow-worthy touches that fit in real homes. Here is why I made this post: I want to help you turn your space into a spooky stage without the stress. You get ideas that are doable on a busy schedule and kind to your budget. You can mix and match these ideas to fit small rooms, big halls, and every corner in between.
I wrote this for people who love DIY projects, cozy gatherings, and a little magic on Halloween night. If you care about warm vibes, clever crafts, and a home that feels festive but not chaotic, this one’s for you. Whether you host a candy crawl, a spooky dinner, or a simple movie night, you can use these ideas to set the scene.
What you’ll get are 25 spooktacular DIY Halloween decor ideas that cover many styles. You’ll learn practical steps, budget tips, and quick tweaks to match your taste. Each idea uses common materials like cardboard, jars, twine, and LED lights, so you can start today. Think chic jars with soft glow, playful paper bats that float in the hallway, and a cobweb garland that drapes over a doorway.
Picture a jar lantern glowing on the entry table, a ceiling of paper bats fluttering in the lamp light, and a cinnamon-scented centerpiece that smells like fall. I show you how to pull off these looks with simple steps you can follow in one afternoon. I also share options for upcycling items you already own, so nothing goes to waste. Safety tips for candles and bright LEDs finish the set, so your space feels spooky without risk.
These ideas work in apartments, houses, and shared spaces. You can adjust scale, swap colors, and lean toward eerie or charming. Think about where to place lighting for mood and where to hide cords. After you try them, your guests will notice the little touches that make a big impact.
Ready to get started? Scroll through the ideas and pick a few to test this weekend. Have fun, make it your own, and share what you create. With a few simple supplies, you can turn your home into a Halloween scene that feels all you.
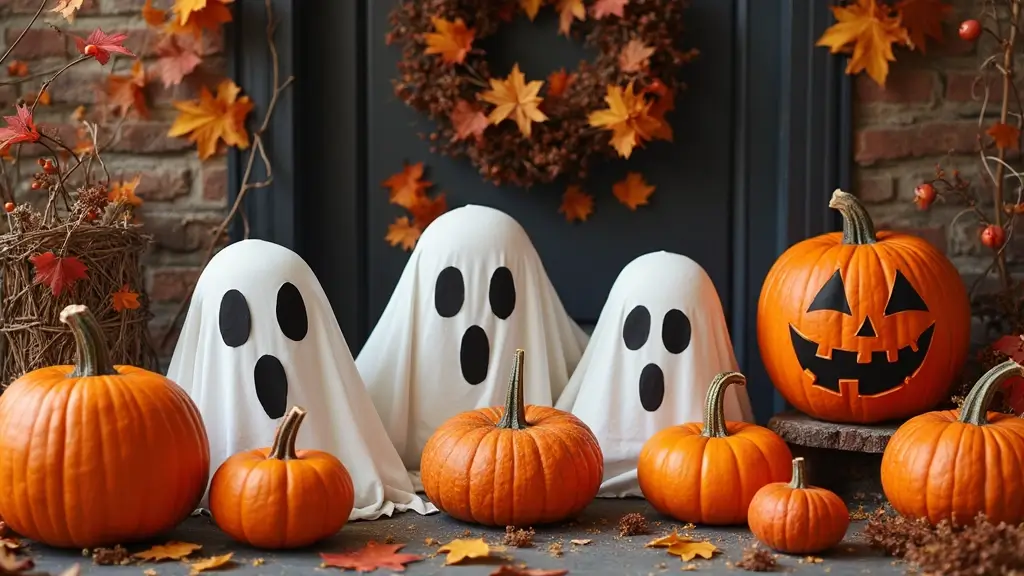
1. Spooky Ghost Lanterns

Want glow that feels spooky yet simple to make? Spooky Ghost Lanterns light the night with a soft, friendly shimmer. They’re easy to pull together and safe for a kid-friendly Halloween setup.
Materials you need:
– Mason jars
– White acrylic paint
– Black marker
– Battery-operated tea lights
– Optional: a bit of tulle for a wispy edge
Here is how to do it:
1) Clean the jars and let them dry.
2) Paint the outside in white. Let the paint dry completely.
3) Draw a ghost face on each jar with a black marker. Try happy, surprised, and sleepy expressions.
4) Slip a battery tea light inside and switch it on.
5) Place the jars along a walkway, on the porch, or perched on a table to cast a gentle glow.
Tips:
– Mix faces so some jars look cheeky and others shy.
– A thin ring of tulle around the top makes the jar feel like a floating specter.
– If you want more light, set a string of tiny warm LEDs nearby to boost the ambience.
Get ready to greet your little trick-or-treaters with a friendly, spooky scene they’ll remember. Set a few along your steps for a guiding glow tonight.
2. Pumpkin Spice Centerpieces

If you want a centerpiece that says fall and Halloween, this pumpkin setup fits your table. It brings warmth and a hint of magic. Here is how to craft a pumpkin spice centerpiece that lasts.
– You choose pumpkins in different sizes.
– You pick colors like orange, white, and green.
– You cut tops off and hollow them out.
– You fill the hollow shells with flowers or LED candles.
– You use blooms such as mums and autumn greens for a rich look.
– You surround with texture: dried leaves, acorns, cinnamon sticks, and a few sprigs of greenery.
– You light it up. You wrap fairy lights around the group or tuck a string inside the largest pumpkin for a soft glow.
Pro Tip:
– Mix textures and colors for depth.
– Use faux pumpkins if you want a long-lasting display.
– If you light candles, use a safe holder and place them away from dry leaves.
This centerpiece creates a warm focal point for your table. It works for dinners, parties, and movie nights. You can scale it up for a big table or shrink it for a small one. Next steps: gather supplies, hollow the pumpkins, and arrange them on a tray or low centerpiece base.
3. Creepy Crawly Mantel Decor

Need a creepy mantel that sets the mood fast with little fuss? Here is a simple plan you can follow.
– Base layer Start with a black tablecloth or dark fabric. It creates a clean stage and deep shadows. If you don’t have fabric, a plain shelf liner works.
– Webs and spiders Stretch fake cobwebs across the mantel and leave gaps for a real look. Tuck in a few plastic spiders here and there. Place some on candle holders and corners for drama.
– Lighting Flickering LED candles cast moving shadows. Place them at different heights so the glow bounces between decorations. Turn off room lights when guests arrive to heighten the eerie effect.
– Drama with fabric Drape extra fabric or hang light ghost shapes from the mantel edge. Layering adds depth and moves with the air.
– Finishing touches Add subtle metallic accents like a small gold frame or silver charm. The shine breaks the dark without stealing focus from your spiders.
– Safe setup Secure each piece with clear tape or clips. Hide cords and keep heat away. Check the display before guests arrive.
Quick Tip:
– For an elegant twist, mix metallic touches with your spooky items.
– Anchor everything to prevent surprises.
Your guests will feel a chill as they approach this creepy, stylish mantel.
Next steps: tweak colors and test lights before the big night.
4. DIY Bat Wall Decor

Want a spooky wall that wow guests with little effort? DIY bat wall decor uses simple black shapes to create fast drama.
Materials
– Black cardstock in a few sizes
– Scissors or a craft knife
– Tape or removable adhesive
– Optional glitter or metallic paint
– A bat template or simple drawing
Make the bats
Cut out several bats in different sizes. Freehand them or trace the template. Keep the wings rounded and the body small so they read clearly. Vary the angles and distances so some seem to glide and others look tucked in.
Layout and placement
Plan a loose flock on a wall or window. Space bats high and low. Let some face left, others right, and a few point up or down. Place larger bats near the top to anchor the scene, and fill gaps with smaller ones. If you use a window, you’ll see bold silhouettes from inside and outside.
Why this works
Black shapes are bold and easy to read. In a dim room, the silhouettes pop and the shadows look like a night swarm.
Glam touch
If you want a hint of glam, brush the wing edges with glitter or metallic paint.
Tips
Use removable adhesive so you can tweak the layout. Check sight lines from the doorway. Do a quick floor layout first to see size and spacing.
Storage
Store flat in a folder so they stay ready for next Halloween.
Next steps
Hang the bats and enjoy a quick, spooky mood.
5. Witch’s Brew Cauldron

You want a DIY Halloween decor item that makes guests stop and stare. A Witch’s Brew Cauldron can do that. It works indoors or outside and adds a playful, spooky touch.
– Start with a large black pot or cauldron. Fill it with green balloons, fake spider webs, and a few googly eyes peeking out.
– For a magical shimmer, add dry ice behind a protective guard. The fog rises as guests approach. Vent the area and never touch dry ice with bare hands.
– Paint a wooden spoon and glue it to the cauldron’s side. It gives a real witchy feel.
– Place floating candles or LED lights around the pot. Let the glow drift through the webs.
Fun Tip: Mix real and fake treats for texture. Gummy worms spill over the edge, plastic eyeballs sit near the rim, and a few candy spiders hide in the web.
– Make it interactive by inviting guests to snap a spooky selfie with the cauldron. Add a simple photo frame or a pretend potion label to boost photos.
Safety note: If you use dry ice, keep kids away and use tongs. Set the cauldron on a sturdy tray so it won’t tip.
With a little care, this cauldron becomes the centerpiece of your Halloween scene.
Create a spellbinding atmosphere with your DIY Halloween decor! A Witch’s Brew Cauldron is not just a decoration; it’s an experience that will leave your guests enchanted and eager for more!
6. Ghostly Garlands

Need a quick Halloween touch that feels playful and not scary? Ghostly garlands fit that need. They’re cheap, simple, and charming. Here is why they work: they sway with the air and fit any room.
Materials you need
– Grab white fabric or felt.
– Have a black marker for faces.
– Get scissors and a roll of twine or fishing line.
– Pick a clear place to work so you can see your work as you go.
Next steps: gather supplies and start.
How to make it
– Cut simple ghost shapes from the fabric.
– Draw small, friendly faces with the marker.
– Line up the ghosts on the string, leaving space between each one.
– Space them to your taste and keep them even from end to end.
– Hang the garland across a mantel, a doorway, or a window.
Style ideas
– Try lace for a delicate, ghostly look.
– Use burlap for a rustic vibe.
– Add bats or pumpkins for extra flair.
– Use different ghost sizes for depth and movement.
Tips for best results
– Secure the ends with a small hook or tape so it won’t slide.
– Let the garland catch a soft breeze to create motion.
– Store flat after Halloween to stay neat for next year.
Think of this as a fast, friendly project.
Your guests will notice a touch that’s friendly and festive.
7. Haunted Mirror

Want to give your Halloween decor a chill without buying new props? A haunted mirror can do it with just a thrift find and a little DIY work.
– Step 1: Choose an old mirror or a cheap one from a thrift shop. Clean it well so paint sticks and looks clean.
– Step 2: Create fog and cloudiness. Apply glass paint or a frosted spray in light layers. Add more coats until the glass looks ghostly but still clear enough to reflect.
– Step 3: Add a spooky message on the back. Use removable window markers so you can change it later. When the light hits the glass, the message seems to float.
– Step 4: Dress the frame for mood. Wrap the edge with lace or dark fabric to give a gothic, antique vibe.
– Step 5: Pick a good spot. A dim hallway or a corner with a faint lamp makes the effect pop without shouting.
Tip:
– Store the mirror in a dim area before your party to boost the eerie feel.
– It also works great in a Halloween photo booth for fun, spooky pics.
Placement matters. Let the light skim the surface so guests catch a quick shudder as they pass. This haunted mirror will make folks look twice and keep the vibe alive all night.
Transform an old mirror into a haunted masterpiece with just a thrift find and some creative flair. Your DIY Halloween decor will have everyone doing a double-take!
8. Graveyard Yard Signs

If you want a spooky yard fast, try Graveyard yard signs. They make a big, eerie impact without a huge project. Use foam sheets for light weight or old wooden boards for a sturdy look. Cut them into tombstone shapes, paint them grey, and add RIP or a funny name to fit your theme. A touch of hot glue creates cracks or cobwebs that catch the eye. Then place the signs among your other decorations to form a cozy graveyard scene.
Materials you’ll need:
– foam sheets or wooden boards
– grey outdoor paint
– black and white accents
– hot glue gun
– yard stakes
– battery-powered LEDs
– weatherproof sealant (optional)
Here’s how to build them:
1) Cut tombstone shapes from your material.
2) Paint a base coat of grey and let it dry.
3) Add details with white or black paint for RIP and names.
4) Use hot glue to add texture—cracks and cobwebs work well.
5) If you want rain protection, seal with a weatherproof coat.
6) Attach stakes and push them into the ground along a path or near your porch.
Lighting and mood:
Place a small LED behind or inside each sign for a soft glow at night. The light makes the letters stand out and adds depth to your display.
Placement tips:
Group three to five stones for a complete graveyard feel. Put signs near corners or along walkways but keep the path safe. Use mulch or fake grass to steady stakes on softer soil.
Pro Tip:
– Outdoor paint holds up to weather.
– Add battery-powered LEDs for a subtle night glow.
With these signs, your yard becomes a memorable Halloween scene that friends will talk about. Next steps: grab your supplies and get started before dusk.
9. Potion Bottles Display

You want a Halloween display that grabs attention without breaking the bank. A potion bottle display fits the bill. Here is how you build it.
What you need
– Collect glass jars and bottles of different shapes.
– Wash and dry them so they shine.
– Fill each jar with water, a few drops of food coloring, and a pinch of glitter.
– Label each jar with spooky names using stickers or tags.
– Examples include Witch’s Brew, Zombie Elixir, and Ghost Mist.
Placement tips
– Place the bottles on a tray or shelf.
– Stack a couple of books or a small crate to add height.
– Tuck in faux spider webs and candles for mood.
Lighting ideas
– Here is why LED lights inside some bottles make the look pop.
– Use battery powered LEDs to stay safe and simple.
– If you want a softer glow, set a few tea lights nearby on the tray.
– For quick setup, scatter a few small LED tea lights around the tray.
Natural twist
– For a natural twist, tuck in leaves or dried herbs.
– This adds an earthy witchy feel.
Next steps
– Start small, then grow your display as you collect more bottles.
– You can switch colors to fit different holidays.
Want extra sparkle? Add glow paint to lid rims for a nighttime shimmer.
| DIY Project | Materials Needed | Cost | Tips |
|---|---|---|---|
| Spooky Ghost Lanterns | Mason jars, white acrylic paint, black marker, battery-operated tea lights | $28.96 (jars) | Mix faces for variety; use tulle for a floating effect. |
| Pumpkin Spice Centerpieces | Pumpkins, flowers, fairy lights, dried leaves | $19.99 (pumpkins) | Use faux pumpkins for longevity; wrap lights for glow. |
| Creepy Crawly Mantel Decor | Black tablecloth, fake cobwebs, LED candles, decorative items | $11.79 (cobwebs) | Layer fabric for depth; secure items to prevent movement. |
| DIY Bat Wall Decor | Black cardstock, scissors, tape, optional glitter | $5.99 (cardstock) | Use removable adhesive for easy layout changes. |
| Witch’s Brew Cauldron | Black pot, green balloons, fake spider webs, LED lights | $23.99 (cauldron) | Mix real and fake treats for texture; use dry ice for effect. |
| Ghostly Garlands | White fabric, black marker, twine | $8.12 (fabric) | Use lace for a delicate look; vary ghost sizes for depth. |
| Haunted Mirror | Old mirror, glass paint, removable markers | $6.88 (paint) | Store in a dim area for a spooky effect; use for photo booths. |
10. Spooked-Up Skeletons

You want Halloween decor that makes guests smile instead of hiding behind the sofa. Spooked-up skeletons can fit that goal. They’re easy to buy, simple to dress, and fun to stage.
– Gather supplies: plastic skeletons in a few sizes, old clothes, hats, scarves, and a handful of small props from around your home. Pick outfits that fit the skeletons and the vibe you want.
– Dress them up: mix and match items. A tiny bow tie, a top hat, or a scarf adds character. Pose each bone figure so it looks natural in its scene.
– Pick spots: porch railing, a tree branch, the dining table, a window ledge, or the mailbox. Place lights to cast soft shadows that hint at a spooky story.
– Add drama: a light touch of fake blood or red paint at key joints can look dramatic. Keep it subtle to stay friendly for kids.
Quick Tip: Use your skeletons to tell a small story. A tea party breaks into a spooky tale, or a book club scene can feel playful. Group them to create a haunted family vibe without being scary.
Here is why this idea pays off: it’s affordable, reusable, and easy to adjust. Change outfits, swap poses, or move them indoors as weather changes. You control the mood with color and light.
Next steps: set up warm lanterns or string lights near the display. Check that each skeleton is secure and easy to see from the street or doorway. With a little care, your spooked-up skeletons will charm guests of all ages.
11. Spider Web Tablecloth

You want a quick, spooky table that wows your guests. A spider web tablecloth does that in minutes. Draping black fabric with faux webs creates a ghostly sight.
What you need
– Black tablecloth sized for your table
– Faux spider webs from a craft store
– Plastic spiders
– Tiny pumpkins
– LED candles or soft battery lights (optional)
How to set it up
1) Clear the table.
2) Lay the black cloth flat.
3) Tease the webs to form thick and thin lines.
4) Drape webs across the table and let some strands hang over the edges.
5) Scatter plastic spiders and tiny pumpkins along the webs.
6) Turn on LED candles for a gentle glow.
Smart tweaks
– Use dishes in a color that pops on black.
– Try white or metallic plates to stand out.
– Keep cords out of reach; use battery lights for safety.
This look is simple, fast, and affordable. It creates a strong Halloween mood without a big mess. Here is why it works: the dark backdrop makes textures pop, and the glow from set lighting adds depth. You can tweak this any time for different vibes. Experiment with web density and pumpkin placement. Play with colors.
Next steps: try different densities and add small goblets, goblin figurines, or candy bowls to finish the scene.
Transform your Halloween table into a spooktacular sight in minutes! A simple spider web tablecloth can create an eerie atmosphere that will leave your guests in awe.
12. Halloween-Themed Pillow Covers

You want a quick, cheap way to add a spooky vibe to your living room. DIY Halloween pillow covers are perfect. They change your mood with the season and you can make them in minutes.
– Start with plain pillow covers in classic Halloween colors: orange, black, or purple. These set the stage for any spooky scene.
– Pick a method for your designs. Fabric paint gives a hand-drawn feel. Iron-on transfers offer clean lines for ghosts, pumpkins, or bats. Both options are simple for beginners.
– Add texture with small felt shapes or buttons. A stitched ghost outline or a tiny knit pumpkin adds depth without much fuss.
Let’s break it down.
Pro tips:
– If you don’t sew, use fabric glue to attach felt pieces. It sticks well and dries clear.
– Try different pillow sizes for a stylish layered look. Pair a large pillow with a few smaller ones for depth.
Here is why this works: it’s affordable, easy to update, and you can rotate designs without buying new decor. Next steps: gather supplies, pick two designs you love, and set a quick crafting session. Your sofa will feel welcoming and seasonal in no time.
Ready for a quick DIY glow up? Start with one cover and go.
13. Frightening Floor Mats

Get your door ready with a DIY fright mat. It greets guests with a warm smile and a hint of scare. You want something simple to make and durable. Here is a plan that works. If rain hits, your design will still shine with a sealant. Then you can reuse it next year. It’s fast, fun, and easy to update.
What you’ll need
– plain coir mat
– outdoor paint
– brushes and sponges
– stencils or masking tape
– chalk or pencil
– weatherproof sealant
Steps
– Pick a short phrase like “Beware” or “Enter If You Dare!” Keep it simple and bold
– Lightly sketch the layout on the mat
– Use stencils for clean letters or freehand for a playful look. A straight line helps keep letters clean
– Add a small ghost or bat motif in a corner. Balance it so the design feels finished
– Paint with bold colors that pop against the mat
– Let dry completely, then seal with outdoor sealant in a well ventilated area. Then apply another light coat if needed
Tips
– Choose weatherproof paint
– Ventilate when applying sealant and let it cure
– Repaint annually if the weather wears the design
This mat sets the spooky tone your Halloween guests will remember.
14. Pumpkin Balloons

Need a quick, cheerful update for your Halloween setup? Pumpkin balloons do the trick. They bring a touch of fall indoors with little effort and big smiles.
What you need
– Orange balloons
– A permanent marker
– Green ribbon or string
– Tape or fishing line
– Optional: helium for a floating effect
How to make them
1) Inflate the balloons. Don’t fill them too full so faces stay clear.
2) Draw jack-o’-lantern faces. Try different expressions to give each balloon character.
3) Decide how to display. Hang from the ceiling in a loose group or build a small bouquet.
Display ideas
– Cluster balloons overhead for a festive surprise.
– Create a balloon bouquet at the entry or on the table for a bright focal point
Tips to up the wow
– Tie green ribbons to the stems to echo pumpkin vines.
– If you want them to float, use helium and attach a light string to the ceiling.
– Vary sizes for depth and a more playful look.
Where to put them
Place them near the doorway, above the dining space, or in a kids’ corner. The faces grab attention and spark smiles.
Here is why this works
It’s simple, fast, and affordable. You get color, charm, and a playful vibe without a big plan.
Next steps
Try new expressions, switch in white faces for a glow‑in‑the‑dark twist, or pair with autumn fabrics.
15. Halloween Snow Globes

You want a Halloween piece that is easy to make. Halloween snow globes fit that need. They sit a table under soft lights. They also make gifts.
Here’s why they work: they use simple supplies, they don’t take long, and you can change the look in minutes.
What you need
– Glass jars with lids
– Mini Halloween figures (ghosts, pumpkins, bats)
– Water, glycerin, glitter
– Paint, ribbon, glue for lid decoration
Step by step
1) Place a few figures in the jar. Keep the setup simple so the scene reads quickly.
2) Mix water with a small amount of glycerin and a pinch of glitter. Glycerin helps the glitter fall slowly.
3) Pour the liquid in and seal the jar tight. Twist the lid until it is snug.
4) Decorate the lid if you want. A coat of paint or a tied ribbon adds charm.
5) Shake the globe and watch the spooky scene rise. Adjust the amount of glitter for a stronger snow effect.
Quick Tip: Use less water for thicker glitter swirls. Personalize the lid with a name for a gift.
These snow globes bring a cozy, magical feel to your Halloween decor.
16. Spooky Window Silhouettes

Want a quick way to make your windows feel spooky? This DIY needs little time and little cost. You get bold night silhouettes that grab attention without a big setup. Simple shapes and a bit of light do all the work.
Grab these supplies: black construction paper or sturdy cardstock, a pair of scissors, and clear tape. You can run a lamp or a bright room light for the glow. For extra drama, place a white sheet behind the silhouettes to boost the contrast when the lights are on. Start with easy icons like witches, bats, pumpkins, ghosts, or black cats. You can mix them up as you like.
Here is how to do it:
– Cut shapes from the black paper. Keep lines clean and the overall look readable from the street.
– Tape the shapes to the inside of the window. Press edges flat so they don’t curl.
– Layer different shapes to add depth. Try a big bat behind a smaller witch for a 3D feel.
– Turn on the room light at night and watch the silhouettes glow through the glass.
Pro Tip: Use a white sheet behind the silhouettes for a stronger contrast.
Pro Tip: Swap out shapes every few days to keep the look fresh.
Your windows turn into a spooky display that’s friendly to do and easy to refresh. Next steps: pick a theme, cut new shapes, and try a different layer arrangement tonight.
17. DIY Mummy Jars

You want a Halloween décor that looks festive but is easy to make. DIY mummy jars fit. They glow softly and invite smiles from guests.
– Gather supplies: empty glass jars, white gauze or cheesecloth, clear craft glue, and black buttons or googly eyes.
– Wrap and secure: start at the bottom and layer gauze in uneven strips.
– Leave an eye gap near the rim.
– Glue holds each band in place so it stays put.
– Add eyes: press two eyes into the gap.
– A crooked stare can feel playful or spooky depending on your vibe.
– Light or treat: fill the jars with candy or drop in a safe LED tealight.
– If you use real candles, never leave them unattended; LEDs are safer around little hands.
Creative Tip: – Paint the jars black before wrapping for a goth look. – Vary the jar sizes and group them on a tray for a curious display.
Next steps: place your mummy jars on a dining table, a shelf, or at the entryway to greet trick-or-treaters. They’re inexpensive, reusable, and easy to adjust as your theme shifts.
These cute mummies bring charm without a lot of fuss, giving your Halloween a friendly, spooky touch for guests of all ages.
18. Candy Corn Vases

Here’s a quick plan for Halloween decor that’s cute and easy. You want a centerpiece that’s big on charm, not on work. Candy corn vases fit the bill.
Let’s break it down:
– Materials: clear glass vases, candy corn, fresh or faux flowers, and optional string lights. Mix in other colored candies for a personal touch.
– Build: lay a base of candy corn in each vase. Add a small bouquet or a few stems on top. The layered colors create a color block look that says Halloween.
– Glow option: tuck in lights around the candy base or weave them through the flowers for a soft glow.
– Variations: use vases of different shapes and heights. Try stacking orange, white, and yellow candy corn for contrast. Add a few Halloween picks for texture.
Tips:
– Keep the candy dry if you plan to use real flowers.
– If you use real stems, add a little water and refresh every few days.
– With faux flowers, you can keep the look for weeks.
Why you’ll love this: it adds a playful, eye-catching touch to any table with little effort. Next steps: place a few around your entry, on the mantel, and at the dining table to set the mood.
19. Shimmery Spider Candles

Want a simple way to give your Halloween a glow that’s both spooky and pretty? Shimmery spider candles are the answer. They’re easy, affordable, and they cast creepy, pretty shadows when the lights go down.
Materials
– plain candles
– small plastic spiders
– hot glue gun or glue
– clear glitter spray
– optional colored candles (black, orange, or purple)
– a tray or parchment to catch glitter
How to make
Here is why this works: you place the spiders, glue them on, then add a glittery shell. The steps are quick and clear.
1) Arrange the spiders around the candle. Put some near the base and a few higher up for depth.
2) Glue each spider in place. Hold a moment so it sticks well.
3) In a well ventilated area, spray a light, even coat of glitter. A gentle mist catches the light without looking chunky.
4) Let everything dry completely. If you want more sparkle, add another thin spray after the first dries.
Safety note: trim the wick to about 1/4 inch before burning. Keep the candles away from curtains and other flammable items. Never leave a lit candle unattended.
Creative Tip:
– Mix sizes of spiders for a layered look.
– Choose candle colors that match your theme—black, orange, or purple work great.
Next steps: place these on a mantel, a side table, or as a haunted centerpiece. They create mood, not mess, and they’re easy to remove after the night ends.
20. Ghastly Ghost Yard Stakes

Want a spooky welcome with little effort? You can use Ghastly Ghost Yard Stakes that are simple to make and fun to see.
Here is what you need to get started:
– Materials: wooden dowels, white fabric or an old sheet, scissors, string or zip ties, permanent markers or fabric paint, LED tea lights or small LED string lights, glow-in-the-dark paint (optional)
Here is how you can build them:
– Cut ghost shapes from the fabric. Make the sheet a bit larger than the dowel so the body loops down.
– Slide the fabric over the top of the dowel and pull it down to form a head, then tie a knot to hold it.
– Draw a scary face with a marker or paint.
– Push the bottom of the dowel into the ground. Let the ghost stand tall or tilt it slightly toward a path.
– For a night glow, you can place a small LED light inside the fabric ghost before sealing it. Or set a tiny light at the base to shine through.
Quick Tip:
– Vary the sizes for a playful, spooky crowd.
– Glow-in-the-dark paint or lights add extra fright at dusk.
Next steps:
– Place several ghosts in a row along walkways or near flower beds.
– Use a soft wind to make them sway for a drifting effect.
– Check the stakes after rain and adjust if needed.
With these easy ghosts, your yard will feel alive on Halloween night.
21. Halloween Themed Wreaths

Need a wreath that welcomes guests and fits your home. You can mix spooky and chic in one DIY piece. Here is how to do it with ease.
– Start with a sturdy base: grapevine for a rustic look or a foam ring for a smooth finish.
– Pick decorations that speak to your style: faux spiders, bats, mini pumpkins, or dried leaves.
– Add texture with fabric. Try tulle for light drama or burlap for a rustic touch.
Think about a personal finish. Add a sign with a playful phrase or your family name to make it yours. Hang the wreath on the front door for curb appeal, or place it inside by a mirror or entryway to set the mood.
Pro Tip:
– Match the wreath colors with your room or door so everything feels connected.
– Make a smaller wreath for the kitchen or dining area to keep Halloween feeling present.
Tips to finish fast: plan first, then glue. Use hot glue in layers, pressing pieces until they set. Add a bow at the bottom or a single charm for a simple focal point.
With care, your wreath becomes a charming clue that Halloween lives in your home. Store it flat for reuse next year. A quick touch up keeps colors bright.
22. Haunted House Table Centerpiece

– Need a DIY haunted house centerpiece that grabs attention at Halloween dinner? Build a haunted house scene that sparks talk and photos.
– Start with a small cardboard box. Paint it to look like a spooky house. Use dark shades and bright window highlights. Draw a door, shutters, and even a witch silhouette in a window.
– Arrange a mini scene around it. Add mini pumpkins, fake spiders, and ghost figurines. Create a tiny yard path with pebbles and moss. Place a friendly ghost near the door.
– Light it up. Use string lights or battery LEDs inside the box. A soft glow makes the scene easy to see from across the room.
– Add fog for drama. If you have a fog machine, let a light mist drift around the base. It adds depth without hiding details.
– Creative Tip: Use different sizes of houses for a layered look. A small, medium, and tall house create a skyline you can admire from all sides.
– Here is why this works. The mix of light, texture, and tiny props keeps the eye moving. It also makes a great backdrop for photos.
– Next steps. Place the centerpiece on a dark table mat. When Halloween ends, remove the lights and store flat for next year.
Create a spooky centerpiece that tells a tale! With a little cardboard, paint, and imagination, your DIY Halloween decor can transform any table into a haunted scene that leaves guests in awe.
23. Eerie Eyeball Decor

DIY Eerie Eyeball Decor
Are you trying to create a spooky vibe without a huge cost or mess? This eyeball decor idea is simple, fun, and a little goofy in the right way.
1) Ping Pong Eyeballs
– Start with white ping pong balls. Paint a crisp white base so the eyes look real.
– Add the iris and pupil with a bright blue or green and a black dot for the pupil.
– Let the paint dry completely. Then place balls in bowls, scatter around the table, or hang them with clear thread so they look like they float.
2) Glass Orbs with Inside Eyes
– Grab clear plastic ornaments.
– Fill the inside with fake eyeballs, beads, or tiny printed eyes you found at a craft shop.
– Seal and screw the cap back, then hang near lamps so the light makes fake eyes glow.
3) Pro Tips
– Glow-in-the-dark paint on the white area makes eyes glow after you turn off the lights.
– Cluster them in groups of three or five for a bold, haunted look.
– Mix sizes for a creaky vibe on a shelf or mantel.
Be mindful of safety. Small pieces can be a choking risk for kids and pets. Keep these out of reach.
Ready to try? It takes minutes but pays off with big scares and big smiles.
24. Spooky String Lights

You want lighting that sets a spooky mood without a lot of work.
Here is why spooky string lights fit Halloween decor. They are affordable, easy to install, and portable.
– Pick your lights and plan where to put them. Use clear or orange string lights for a classic look.
– Wrap them around your house, porch railings, or yard trees to create a warm, eerie glow.
– Attach mini figures like ghosts, bats, or pumpkins to the wire with twist ties or small clips. They move with the light and catch the eye.
– For a dramatic effect, drape black mesh fabric over a strand or two. The light shines through while the fabric adds depth.
– Try indoor and outdoor setups. A bright window display can welcome trick-or-treaters, while a cozy porch keeps guests comfy.
Quick Tip: Use remote-controlled lights for easy on and off. A mix of orange and warm white can fit many themes without looking too busy.
Next steps: test your layout at dusk, adjust heights, and hide cords with clips.
Place lights higher than eye level for safety and better sight lines. If you go outdoors, pick weatherproof cords and a timer to save energy. Battery-powered strands are handy on patios with no outlets.
25. DIY Spooky Scarecrows

You want a Halloween look that stands out without a lot of work. DIY spooky scarecrows fit the bill. They add charm and a friendly fright to your yard.
What you need
– Old clothes that still fit
– A straw hat or cap
– Sticks or a wooden dowel for a frame
– Straw, leaves, or soft stuffing
– String or twine
– A marker or small can of paint
Step-by-step
1) Build a simple frame by crossing sticks to form a torso.
2) Stuff the clothes with straw or leaves to give shape.
3) Tie the arms and legs so they hold a pose.
4) Put on the clothes and set the hat on top.
Face and mood
– Use a marker for a friendly face, or paint a spooky grin.
– Tilt the head slightly and pose the arms to wave, peek, or stand guard.
Placement
– Put the scarecrow on the porch, near the driveway, or among pumpkins.
– A playful walking pose or a looking-over-the-shoulder stance adds humor and suspense.
Helpful Hint:
– Add a pumpkin as a head for more character!
– Personalize your scarecrow with a fun sign!
Optional glow
– A small string light tucked in the clothes makes it glow at dusk.
These DIY scarecrows bring warmth and whimsy to your Halloween display.
💡
Key Takeaways
Essential tips from this article
🎃
BEGINNER
Craft Spooky Lanterns
Create friendly spooky ghost lanterns using mason jars, white paint, and battery-operated lights for a charming glow.
🕷️
QUICK WIN
Creepy Mantel Decor
Set the mood with a black tablecloth, spider webs, and plastic spiders for an easy and effective mantel decoration.
👻
BEGINNER
Make Ghostly Garlands
Use white fabric or felt to create ghost garlands that sway charmingly, adding a festive touch to any room.
⚗️
PRO TIP
Potion Bottle Display
Collect glass jars and fill them with colored water and spooky items for an eye-catching Halloween display.
🖼️
ADVANCED
Haunted Mirror Effect
Transform an old mirror into a haunted piece by applying a foggy paint effect for a chilling addition to your decor.
🦴
QUICK WIN
Spooked-Up Skeletons
Dress up plastic skeletons with old clothes and props to create a fun and whimsical Halloween atmosphere.
Conclusion

With these 25 spooktacular DIY Halloween decor ideas, your home will be a highlight of the spooky season! From charming ghost lanterns to eerie wreaths, there’s a project for everyone to enjoy. Let your creativity shine this Halloween and make your space a frightful delight. Don’t forget to share your own creations and inspire others to join in the Halloween spirit!
Frequently Asked Questions
What Are Some Easy DIY Halloween Decor Ideas for Beginners?
If you’re new to DIY Halloween decor, start with simple projects like Ghostly Garlands or Spooky Ghost Lanterns. These crafts require minimal materials and are perfect for adding a fun, spooky touch to your home without overwhelming you.
These projects are not only easy to make but also provide a charming atmosphere for your Halloween festivities!
How Can I Create a Spooky Atmosphere Without Spending a Lot?
Creating a spooky atmosphere doesn’t have to break the bank! You can use affordable materials like black fabric, cardboard, and glass jars for projects like Haunted Mirror or Potion Bottles Display.
Focus on lighting as well—simple string lights can transform your space into a Halloween haven. Remember, creativity trumps cost when it comes to DIY Halloween decor!
What Materials Do I Need for DIY Halloween Crafts?
The materials for DIY Halloween crafts can be quite simple! Common supplies include black cardstock, glass jars, fabric, and basic tools like scissors and glue.
Depending on your project, you might also need items like fake spiders, pumpkins, or even thrifted mirrors. Check your home for supplies before buying new ones—recycling is a great way to save money and the environment!
Are DIY Halloween Decor Ideas Kid-Friendly?
Absolutely! Many DIY Halloween decor ideas are kid-friendly, especially projects like DIY Mummy Jars and Ghostly Garlands. These crafts are safe and engaging for children, allowing them to express their creativity while getting into the Halloween spirit.
Just ensure adult supervision when using scissors or hot glue, and enjoy crafting together as a family!
How Can I Make My Halloween Decor Stand Out?
To make your Halloween decor truly stand out, focus on unique touches like DIY Bat Wall Decor or a Haunted House Table Centerpiece. Mixing different textures, colors, and lighting can create depth and interest in your displays.
Don’t forget to personalize your decor with items that resonate with your style—whether it’s whimsical, spooky, or elegant, make it your own!