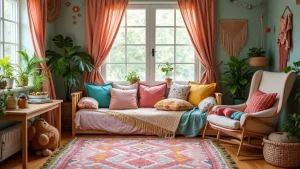
20 Incredible Halloween Home Decor Ideas That Won’t Break the Bank!
I put this together because I want Halloween decor that sparks joy without blowing the budget. The season has me chasing simple, cozy spaces that feel festive in minutes. So I pulled together 20 incredible ideas that create big impact using things you already own or can grab for a few dollars.
If you decorate on a tight schedule or a tight budget, this post is for you. If you love homey vibes and care about clever, practical ideas, you’re the audience. It fits busy families, renters, roommates, and students who want a space that feels playful without clutter.
You’ll get clear, doable ideas that are easy to shop for, quick to assemble, and simple to tweak for your space. Each idea uses common materials like paper, fabric, string lights, pumpkins, and thrift store finds. I also share rough costs, step by step tips, and safety notes for homes with kids and pets.
These ideas play with color and texture. Think warm amber glow on a mantle, a friendly ghost cut from fabric, a cobweb curtain made from yarn, and a centerpiece built from mini pumpkins and twine. They work in small apartments and big living rooms alike.
You’ll learn how to plan your decor in minutes, shop smarter, and reuse props next year. The approach focuses on items that can be packed away easily and used for other holidays as well.
Ready to get started? Pick a few favorites, mix in what you already own, and turn your house into a fun Halloween scene without a big bill. Let us dive in and get decorating.
1. Spooky Silhouette Window Clings

Want a quick, budget-smart way to set a Halloween mood? Spooky silhouette window clings fit the bill. Here is why they work. They are cheap. They are easy to make. They light up at night. They add a playful spook to any room. It’s a simple project that can be done in an afternoon.
Here is how you can make DIY window clings that wow guests without breaking the bank.
– What you need You need black construction paper, scissors, tape, and a light behind the window for glow.
– Design and cut Draw simple silhouettes like bats, ghosts, witches, and moons. Cut them out. Use a few sizes to add depth.
– Display and light Place the clings on the inside of the glass. Turn on the lamp behind the window. The shapes glow and cast spooky shadows.
– Layer for depth Layer smaller figures in front of larger ones. Tilt some shapes for a haunted look. Move them until you love the scene.
– Removability and care Add a touch of tape on edges so you can peel them off later. Light tape helps avoid sticky residue.
– Removal tips When Halloween ends, peel gently and store the clings flat for next year. Wipe the window to remove dust.
What you do next is test a few shapes this week and plan your layouts before dusk.
2. DIY Pumpkin Centerpieces

You want a Halloween centerpiece that looks great without draining your budget. DIY pumpkin centerpieces fit. They’re easy to make and you can reuse them after October. This is your chance to add color, texture, and a personal touch to your table. Ready to build one you’ll love showing off? This plan keeps things simple. Here is how.
What you’ll need
– Small pumpkins from the market or a craft store
– Paints in colors you love, like chalk or spray paint
– Moss, faux leaves, and a string of battery fairy lights
– Height boosters: a cake stand, a wooden board, or an inverted bowl
– Autumn flowers such as mums or sunflowers for a bright finish
How to assemble
– Clean pumpkins and let them dry
– Paint with one or two coats, then let each coat dry
– Tuck moss and leaves around the base
– Place pumpkins on the height stands and weave lights around them
– Add a small bouquet or single stems in a nearby holder to finish
Style ideas
– Metallic tones like gold or deep blue for a bold look
– Neutral chalk paint with natural textures for a rustic vibe
Tips for lasting decor
– Test a color on a tiny patch first
– Use battery lights to avoid cords
– Seal painted pumpkins with a clear spray
– Protect your table with a tray or placemat
Seasonal switch
– Swap in autumn blooms and orange gourds to move from Halloween to Thanksgiving
– Then swap in new blooms to match the season
Next steps.
| Decor Idea | Materials | Estimated Cost | Suggestions |
|---|---|---|---|
| Spooky Silhouette Window Clings | Black construction paper, scissors, tape, light | $4.09 | Use light tape for easy removal. |
| DIY Pumpkin Centerpieces | Small pumpkins, paints, moss, fairy lights | $12.99 | Test colors and seal painted pumpkins. |
| Creepy Crawly Table Settings | Black tablecloth, plastic bugs, candles | $8.99 | Use battery candles for safety. |
| Ghostly Garland | White balloons, cheesecloth, string, marker | $7.99 | Wrap fairy lights for a magical glow. |
| Haunted Mirror | Mirror, spray adhesive, glitter, LED lights | $14.29 | Check lighting before guests arrive. |
| Floating Ghosts | White balloons, fishing line, marker | $6.99 | Vary string lengths for different heights. |
| Miniature Graveyard | Tombstones, skeletons, faux grass, LED lights | $6.98 | Use different tombstone shapes for interest. |
3. Creepy Crawly Table Settings

Want a Halloween table that thrills guests without draining your wallet? Creepy crawly table settings pull a sharp, spooky look with simple, low-cost items. Plastic spiders, snakes, and fake bugs do the heavy lifting so you don’t have to spend big.
Here is why this works:
– It’s quick to do. You can set the mood in minutes and change it as you go.
– It feels playfully scary, not too grim for kids or families.
– It uses items you can reuse next year or mix with other decor.
What you need
– A deep black tablecloth. It acts like a midnight stage for your critters.
– A small cluster of plastic bugs. Choose a mix of spiders, beetles, and snakes for variety.
– Dim lighting. Candles or battery-powered tealights cast eerie silhouettes.
How to set it up
– Table base: Spread the black cloth smoothly. Keep edges neat so the bugs can stand out.
– Plate display: Place plates so a few bugs peek from beneath. This creates a fun, unexpected moment.
– Accent lighting: Put candles or faux candles along the center. The glow makes the bugs look alive.
– Napkins and glassware: Fold napkins with a tiny bug tucked inside. Set glasses on a tray that adds texture, like dark felt or faux moss.
– Safety note: If you light real candles, keep them away from plastic and paper. Battery options avoid risk.
Next steps
– Scout thrift and party stores for deals. Buy early to save money.
– Test the setup in daylight first. Adjust spacing until the table feels balanced.
– Add a final touch, such as a small sign that reads “Beware of bugs,” to spark laughs.
This approach keeps your table festive, affordable, and easy to recreate year after year.
4. Ghostly Garland

If you want a cute Halloween touch that’s cheap and simple, a ghostly garland fits the bill. It lights up a room or porch without a big mess or cost. It’s quiet fun to make with family or friends. Here is why it works: it’s flexible, easy to store, and eye catching at night.
Here is how to make it fast and easy.
– What you need — white balloons, cheesecloth or white fabric, scissors, a marker, string or fairy lights, and tape for outdoor use.
– How to shape the ghosts — inflate a balloon to a comfortable size. Drape cheesecloth around it to form a body. Tie a small knot at the neck to keep the fabric in place.
– Add spooky faces — draw simple eyes and a mouth with a marker. You can keep it plain or give each ghost a tiny grin.
– Where to hang — stretch a line across a mantel, window, doorway, or along the porch rail. Slide the ghost shapes along the string with even gaps.
– Outdoor tips — pick weather resistant fabric if the garland stays outside. Use a sturdy line and avoid sharp nails.
– Finish and glow — wrap a few fairy lights around the garland or let them peek from behind the ghosts. Night time looks especially magical.
Next steps: start with a 3 to 4 foot garland and add more sections as you gain confidence.
5. Haunted Mirror

Want a haunted look that fits your budget? Here is why it helps your Halloween vibe. A backlit mirror adds depth and glow to any wall. It creates a focal point guests notice right away.
– What you need
– You need a mirror with clean edges.
– You need spray adhesive and black glitter.
– You need a clear sealant to lock the glitter.
– You need colored LED lights or a small backlight.
– You need cobwebs or faux spider webs.
– You need a few plastic spiders.
– You need tape and a nail or hook for hanging.
– How to do it
– Clean the mirror edges and dry them well.
– Spray a thin line of adhesive along the edges. Then sprinkle glitter and tap off the extra.
– Let it dry for a few minutes, then seal with a clear coat.
– Place a LED light behind the mirror to create a ghostly glow. Choose purple, blue, or red for the mood.
– Drape cobwebs around the frame and tuck the ends into the corners.
– Hang the mirror where guests will see it first, like the entry hall.
– Pro tips
– Check lighting in a dim room before guests arrive.
– Hide cords with a cord cover.
– Start simple and add more decor later if you want.
This quick setup gives you a spooky feature that looks big and costs little.
6. Halloween-Themed Throw Pillows

Looking for a fast, affordable Halloween upgrade for your living room? Throw pillows can do the job. They add color, comfort, and that spooky vibe with almost no effort. You can find cheap pillow covers online or at craft stores. Choose designs with pumpkins, ghosts, bats, or fun sayings. Here is why this works: they’re easy to swap, easy to store, and easy to wash. Let’s break it down into simple steps.
– Color plan: Stick to orange, black, and purple. Start with two solid covers and add one printed piece to spark interest.
– Mix patterns: Pair a solid with a print. Try stripes with a pumpkin motif or a small dot with a ghost design.
– Texture and size: Vary textures to add depth. Pick cotton, velvet, and knit. Use 12×20 and 18×18 sizes to create rhythm. Choose washable covers for easy care.
– DIY boost: If you sew a bit, add a tiny applique or paint a simple design on a cover for a personal touch.
– Seasonal switch: After Halloween, swap in fall or winter covers. Store the Halloween set in a labeled bin so you can reuse it next year.
These pillows bring warmth and festive flair with little cost. They’re practical and quick to refresh. Next steps: hunt for deals, pick a few covers, and start decorating tonight.
Transform your living room with Halloween home decor in a snap! A few spooky throw pillows can create a cozy vibe without breaking the bank. Swap them out easily for a festive feel!
7. Candle Jars with Spooky Labels

Here’s a budget-friendly way to add a haunted glow to your space. Candle jars with spooky labels do the trick fast.
– Reuse jars: Collect clean glass jars from sauces or jams. Wash them, dry them, and peel off any old labels. A bare jar shows your label better.
– DIY labels: Make your own labels with simple supplies. Use cardstock, markers, and white paint for a ghostly look. You can stamp small icons or draw stars. Seal with clear tape or a light coat of Mod Podge so labels last.
– Paint and wrap: Paint the outside of jars with matte black spray. Let it dry. Wrap a bit of cheesecloth around the neck for a dusty, haunted feel.
– Label ideas: Witch’s Brew, Pumpkin Spice Potion, Ghostly Glow, Midnight Melt, Cedar Night Elixir.
– Scent choices: Choose candles that smell like cinnamon, pumpkin, vanilla, or cedar. Pick scents that fit your vibe, not just one.
– Layered display: On a tray, place jars of different heights. Mix tall and short pieces for depth. Add a few LED tealights for safety.
– Safety and cost: Fire risks exist with real flames. If you can, use LED candles.
Next steps: Set the display on your entry table or porch and enjoy the warm, spooky light.
8. Witch Hat Door Wreath

You want a Halloween welcome that won’t break the bank. A Witch Hat Door Wreath fits. It’s easy and fun. Here’s how.
Materials:
– Straw wreath form
– Black witch hat
– Hot glue or craft glue
– Faux flowers, ribbons, or small pumpkins
Steps:
1) Glue the hat to the straw base. Tilt it for a playful look.
2) Add color and texture. Glue on a few bright flowers or lace against the black hat.
3) Finish with small accents. A ribbon bow or a tiny pumpkin tucked into the flowers adds charm.
Variations to try:
– Color Pop: Bold flowers in red, orange, or purple stand out against black.
– Hanging options: Use a matching ribbon or natural jute string. Tie a loop so the wreath sways.
– Indoor or outdoor: Put it on a front door or hang inside as a playful display.
Why it works: it greets guests with whimsy and sets mood. It’s cheap and easy to swap for other holidays.
Practical tips:
– Weather care: spray a light sealant on flowers to resist rain.
– Secure feel: add two glue points to keep the hat in place.
– Placement: hang the wreath at eye level for best impact.
Next steps: try this tonight, snap a photo, and share your setup. Your doorway will charm every knock.
A Witch Hat Door Wreath is the perfect way to greet guests with a splash of Halloween spirit! Affordable and fun to make, it’s a charming touch that turns your home into a festive haven.
9. Spider Web Table Runner

Want a quick Halloween table touch that won’t cost a lot? A spider web table runner fits the bill.
Use black lace or sheer tulle to create the web look.
Measure your table, then cut the fabric to the right length.
Drape the runner over your current tablecloth to add instant texture.
What you need
– Black lace or sheer tulle
– Burlap for layering (optional)
– Plastic spiders
– LED candles
– Pins or tape to secure
For extra fright, scatter plastic spiders along the web.
Layer the runner with burlap or rough fabric for a rustic twist.
Place candles of different heights along the runner to cast spooky shadows.
Opt for LED candles to stay safe near fabric.
Lightly pin or tuck the edges so it stays flat.
If you want a looser feel, try black cheesecloth instead of lace.
You can also add a splash of color with small orange or silver accents.
This trick is inexpensive and easy, yet it makes a strong Halloween vibe.
It works with most table sizes and shapes, and it suits both casual dinners and parties.
When you’re done, shake off dust and air dry any fabric that’s damp.
Play with the lighting to set the mood.
Bright lights work for a party, while dim lights feel eerie.
10. Magical Potion Bottles

You want a Halloween look that feels magical but stays cheap. DIY potion bottles can give you a standout centerpiece. They spark curiosity and invite guests to lean in.
Here is how to pull it off.
What you need
– Gather small glass bottles with corks or lids.
– Get colored water, safe glitter, or tiny beads.
– Pick simple props like feathers or small candies.
– Cut labels from plain paper to create names.
How to fill
– Fill the bottles with colored water.
– Add a pinch of glitter to catch the light.
– Slip in a feather or bead to add a tiny story.
– Layer colors to hint at different potions.
Label ideas
– Name potions Moon Mist, Dragon Breath, or similar.
– Use old paper or tea-stained cards for a vintage vibe.
– Attach labels with string or a thin ribbon.
Display tips
– Line the bottles up on a shelf for a neat look.
– Place a small tray to group them and tell a mini scene.
– Add a soft backlight or a nearby candle for glow.
Ways to use them
– Let guests guess what each potion does as they walk by.
– Add a few glow stickers to the labels for night visibility.
Next steps: try different fillings and layouts until you find a setup that fits your space.
11. Frightening Framed Art

Want a spooky touch without spending a lot? Frightening Framed Art can do the trick. Old frames get a fresh life when you fill them with Halloween prints, eerie photos, or short quotes. You can print free artwork online, or draw and scan your own quick designs. This simple setup makes a big impact and stays friendly to your budget.
Here is why this idea shines for Halloween: frames pull the eye, and art inside can tell a playful ghost story across your wall.
– Gallery Wall: Build a grid or salon-style wall using frames of different sizes. The mix looks intentional and gives you a ready-made spooky focal point.
– Mix Styles: Pair rustic wood frames with sleek black or white ones. The contrast adds charm and keeps the display lively.
– Temporary Display: Use removable hangers or poster putty so you can swap art after the season ends. No nails, no mess.
How to set it up in minutes:
– Start with one bold piece in the center, then arrange around it on the floor first.
– Keep even spacing, about 2 to 3 inches between frames.
– Clip or tape the art securely so it stays flat behind the glass.
With these steps you get a striking look that’s easy to update year after year. Enjoy a creative, budget-friendly Halloween display you can change in a snap.
Transform ordinary frames into haunting masterpieces! With just a little creativity and free prints, your Halloween home decor can tell spooky stories without draining your wallet.
12. DIY Skull Planters

Want a quick, low-cost way to give your home a Halloween glow? DIY skull planters do the trick. They’re simple, fun, and great for indoor spaces like mantels or side tables.
Here is how to turn plastic skulls into living decor:
– Choose skull planters with a clean drainage hole already in place, or drill one if needed.
– Add a thin layer of gravel for drainage, then fill with regular potting soil.
– Pick a plant that fits inside the skull’s mouth or crown. Small succulents work well, as do trailing plants like pothos or ivy.
– Place the skulls where they’ll catch eye contact, such as a mantel centerpiece or a coffee table row.
For the best effect, pair colors with the skulls. Plants with green or purple tones pop against pale skull plastic. A group of skulls in varied sizes adds drama without crowding the space. Keep the look easy by sticking to two or three matching colors and varieties.
Next steps is care. Water only when the soil feels dry and avoid soggy spots. If a skull sits in direct sun, rotate it so the plant gets even light. If you want a spookier vibe, try a skull painted in an antique white and finish with a light moss top.
Skull planters bring life to your Halloween setup without a lot of work.
13. Floating Ghosts

Want a cute outdoor Halloween touch that doesn’t drain your wallet? Floating ghosts you can make from white balloons bring a playful, spooky vibe to your yard. They drift with the breeze and catch the eye of every trick-or-treater.
What you’ll need
– White balloons
– Fishing line or thin string
– Tape or a small stake
– A black marker
How to set them up
– Inflate the balloons to a medium size.
– Tie a piece of string to each balloon knot.
– Secure the other end to a tree branch, railing, or porch.
– Vary the string lengths to place ghosts at different heights.
Face designs
– Draw simple ghost faces with a black marker.
– Give each ghost its own smile or look.
– Keep lines thick so faces read from a distance.
Lighting tips
– Place soft lights near the ghosts for a gentle glow after dark.
– Use small solar lights or LED lanterns to create a warm shimmer.
– Position lights so the faces stay clear and not washed out.
Safety and setup tips
– Check the forecast before you go out.
– Make sure strings are tight and do not cross walkways.
– Watch for wind; you may need to adjust some heights.
Why this works for you
It’s quick to install and easy on the budget. You get big visual impact with little effort. It’s kid-friendly and safe for most yards.
Next steps
Place the ghosts at dusk first, then tweak heights and spacing. Add more ghosts if you want a fuller scene. Try different porch spots to see what your neighbors notice most.
14. Bat Decor

You want a spooky Halloween look that won’t blow your budget. Bat decor fits that need fast. It’s simple to make and easy to change. Here is why bat decor works. Let’s break it down. Here is how you can pull it off.
What you need
– Gather black cardstock or foam sheets and a sharp knife.
– Have scissors, tape, and glue on hand.
– Get a thin string or fishing line and a small hook or tape.
– Consider LED string lights for a subtle glow.
Cut and shape
– Cut several bat silhouettes in different sizes.
– Fold the wings a bit to add a 3D feel.
– Glue a tiny dot at the body to keep each bat in a rounded pose.
Arrange
– Hang the bats high on a wall or from the ceiling.
– Create a flying V by spacing them in a V shape.
– Vary the heights so some appear to dip and swoop.
Light it up
– Drape a string of LED lights behind the group to cast shadows.
– Point lights toward the bats so the silhouettes stand out.
Placement ideas
– Use a hallway, entryway, or living room to set a mood.
– Let a few bats peek from windows for a night scare.
Tips
– Use clear fishing line for a hanging effect.
– Tape corners well so the bats stay put.
Next steps
– Gather supplies and start tonight.
– Test at dusk to see how the light falls on walls.
15. Halloween-Themed Welcome Mat

If you want a warm Halloween welcome without wasting money, start with a themed mat at your door. You can grab a budget mat or make your own from a plain mat and fabric paint. Either option sets the mood fast and easy.
Two quick routes
– Buy a budget mat: pick a design you love and you’re done. Look for outdoor-safe paint so it lasts.
– DIY mat: start with a plain coir or rubber mat. Paint with fabric or acrylic paint. Use a stencil for clean letters, then seal when it dries.
Ways to personalize
– Seasonal quotes: try Trick or Treat, Welcome, Ghouls, or Boo. Change it up each year.
– Stencils: choose a simple font. Tape the edges so letters stay sharp. A single bold message works best.
– Layering: put a smaller mat on top of a larger one. Add a ribbon edge or a spooky trim for depth.
Practical tips
– Materials: outdoor paint, stencil brushes, sealant. Pick orange, black, purple, or lime.
– weatherproofing: seal the paint after it dries. This helps rain and sun.
– care: wipe with a damp cloth. Let it dry flat between uses.
Next steps: pick a route and start this weekend.
A welcoming Halloween mat sets the tone for your spooky season—whether you buy it or DIY, it’s all about creating that festive vibe without breaking the bank!
16. Miniature Graveyard

Miniature Graveyard
You want a cute but spooky Halloween touch that doesn’t cost a lot. A miniature graveyard is perfect for a table centerpiece or a yard corner. It gives big vibes without big price tags.
What you need
– Tombstone decorations (foam or plastic) in a few sizes
– Plastic skeletons to peek from behind stones
– Faux grass or moss for a realistic feel
– Battery‑operated candles or small LED lights
– A shallow tray or flat mat to hold everything in place
How to set it up
– Start with the largest tombstones at the back to create depth.
– Put smaller gravestones in front for a layered look.
– Tuck a skeleton or two around the stones so they seem to guard the path.
– Scatter faux grass or moss around the stones for texture.
– Add soft light with battery candles or LED strings so it glows at night.
– Weigh down pieces if wind is a factor; a small tray helps keep them steady.
Tips to level it up
– Use different tombstone shapes and heights for visual interest.
– Write fun or spooky epitaphs to give it personality.
– Keep heat away from decorations; use LEDs instead of real flames.
– Try a theme switch like a haunted town or graveyard with a misty look using light fog in a safe spray bottle.
Next steps
– Place it where guests will see it first.
– Take a quick photo to remember the layout.
– Reposition pieces after sunset for the best glow.
17. Pumpkin Painting Party

You want Halloween decor that is fun and affordable. A pumpkin painting party fits the bill. It keeps the mess down and gives you a cute display you can keep.
Here is why it works. It lets everyone join in and creates one pretty set of decorations in minutes.
Materials
– Pumpkins: Grab a handful of inexpensive pumpkins and a small set of acrylic paints.
– Tools: Also collect brushes, markers, and a protective work surface.
– Setup: Protect the table with old newspapers and have a cup of water for rinsing.
How to run it
– Theme days: Pick fun ideas like scary faces or cute designs.
– Simple is best: Encourage easy designs and offer stencils for beginners.
– Pace and mood: Set a relaxed pace so everyone finishes with pride.
– Snacks: Keep light snacks and drinks handy to keep energy up.
Display and cleanup
– Gallery: Turn finished pumpkins into a mini gallery on a wall or mantel.
– Longevity: Seal the painted pumpkins with a clear spray so they last through the season.
– Reuse tip: If you want to reuse pumpkins later, store them in a cool spot.
Next steps: choose a date, invite friends, and plan 2–3 simple designs. You’ll get festive decor fast without a big spend.
18. Halloween-Themed Cozy Throws

You want a warm, festive home this Halloween without breaking the bank? Start with a Halloween-themed cozy throw. Pick a blanket in Halloween colors: orange, black, purple, or one with pumpkins, ghosts, or bats. Choose a soft material you can feel when you touch it: fleece, knit, or chenille. Make sure it’s easy to wash.
Here is why these throws work:
– Style fast: Drape a throw over a sofa back or chair. It adds color and warmth in seconds.
– Layer for comfort: Place a second throw with a different texture next to a pile of pillows to make a cozy corner.
– Play with texture: Combine a fuzzy knit with a smooth cotton pillow and a woven rug.
– Easy care: After the season, fold and store in a simple bin.
– Refresh next fall: Bring it out to refresh the look.
What practical steps can you take today?
– Size matters: For a couch, 50×60 inches works well. If you want a bed throw, go 60×80 inches.
– Keep it neat: Check care labels and machine wash cold.
– Use anywhere: A throw doubles as a table runner on a small coffee table.
Next steps: head to the store or your linen shelf, pick one or two prints, and start layering. You will feel the Halloween vibe without a big spend.
19. DIY Haunted Lanterns

You want a spooky Halloween look that doesn’t drain your wallet. DIY haunted lanterns can give you that glow fast. Turn plain lanterns into eerie lanterns with a little spray paint and fake lights inside. This weekend, you can have a warm, ghostly vibe without a big price tag.
– Prep and paint
Choose sturdy lanterns and give them a quick wipe. Spray with matte black, deep purple, or burnt orange. Let every coat dry before you add another layer.
– Layering for drama
Place lanterns at different heights. Use a small crate or a stack of books to raise some. A mixed group makes the glow look fuller along your path.
– Color ideas
Mix two colors for contrast. Black with purple accents feels moody. A touch of orange makes the scene read Halloween fast.
– Lighting method
Pick LED candles or glow sticks. They stay cool and safe near dry leaves. Check brightness so you can see the glow at dusk.
– Placement ideas
Line your walkway or porch with lanterns. Put a cluster at the top of the steps to welcome guests. Add a few by windows for indoor glow too.
– Weather and safety
Choose weatherproof lanterns for outdoor use. Avoid real flames. Secure lightweight pieces when the wind picks up.
– Finishing touches
Add inside silhouettes with cutouts or vinyl scraps. You can also tape glow-in-the-dark stickers for extra detail.
– Maintenance
Store and wipe lanterns dry after the season. Touch up paint if it chips.
Next steps: grab a few lanterns this weekend and start with one color. You’ll have a crisp, inviting Halloween look in no time.
20. Fall Foliage and Bats Combination

You want Halloween decor that fits the season and your budget. A mix of fall foliage and bats does that with ease. It adds warmth and a playful spooky vibe to walls, doors, or tabletops. Here is how to pull it off.
– Layered Look: Build depth by stacking leaves and bat silhouettes. Use a mix of red, orange, and brown leaves. Attach with removable tape or small pins. Let some leaves sit closer to the surface and others peek out for shade and texture.
– Natural Elements: Real leaves give an organic feel. If possible, press a few first so they stay flat. Clip or glue lightweight bats among the leaves for a soft, rustic look.
– Versatility: This combo easily shifts to Thanksgiving. Swap in muted greens or golds, add wooden accents, and replace the bats with small pumpkins or pine cones.
How to set it up in seven simple steps:
1) Gather supplies: faux leaves, real leaves, bat cutouts, string, tape, scissors.
2) Plan the space: choose a wall, door, or table. Lightly mark anchor spots with painter’s tape.
3) Create depth: hang leaves at different heights using clear threads.
4) Place the bats: position several among the leaves. Vary sizes and angles.
5) Table option: lay a simple runner, scatter leaves, and let bats perch on napkins or place cards.
6) Preserve real leaves: press for a week, then seal with a light spray to keep color.
7) Transition after Halloween: swap in calmer tones and add a few fall gourds for a cozy, seasonal finish.
Pro tips to boost impact:
– Use warm LED lights to highlight the colors of the leaves.
– Choose matte black bats for strong contrast.
– Use damage-free hooks on doors or walls for easy removal.
– Keep the look clean: two to three clusters read as intentional decor, not clutter.
This fall foliage and bats combo gives you a quick, affordable way to capture the season. It’s easy to tweak later, and it looks inviting from every angle.
💡
Key Takeaways
Essential tips from this article
🕸️
QUICK WIN
Spooky Window Clings
Use DIY spooky silhouette window clings for an easy, budget-friendly way to create a festive atmosphere.
🎃
ESSENTIAL
DIY Pumpkin Centerpieces
Create colorful and textured DIY pumpkin centerpieces that can be reused beyond Halloween for added value.
👻
BEGINNER
Floating Ghosts
Make playful floating ghosts from white balloons to add a whimsical touch to your outdoor decorations.
🕷️
QUICK WIN
Creepy Crawly Table Settings
Incorporate plastic spiders and fake bugs into your table settings for a thrilling yet low-cost Halloween vibe.
💡
PRO TIP
Haunted Mirror Focal Point
Create a haunted look with a backlit mirror to enhance the ambiance and serve as an eye-catching centerpiece.
🪄
ADVANCED
Magical Potion Bottles
Transform small glass bottles into DIY potion displays to spark curiosity and add a magical touch to your decor.
Conclusion

With these 20 incredible Halloween home decor ideas, you’re now fully equipped to create a spooky yet budget-friendly atmosphere in your home!
Remember, the essence of Halloween is all about creativity and having fun, so don’t shy away from experimenting with colors, textures, and personal touches.
Get your decorations ready, and let your home be the talk of the neighborhood this Halloween!
Frequently Asked Questions
What Are Some Affordable Halloween Home Decor Ideas?
If you’re looking for budget-friendly options, consider DIY projects like spooky silhouette window clings or creepy crawly table settings. These ideas are not only affordable but also easy to make and can set a festive mood in your home without breaking the bank.
Other ideas include DIY pumpkin centerpieces, ghostly garlands, and haunted lanterns. Each of these can add a cozy, Halloween vibe to your space!
How Can I Create a Spooky Atmosphere Without Spending Much?
Creating a spooky atmosphere doesn’t have to cost a fortune! Try using simple items like plastic spiders for table settings or bat decor to hang on your walls. You can also repurpose items you already have, like glass jars to make candle holders with spooky labels.
Additionally, consider using fall foliage in combination with Halloween decorations to add warmth and a playful vibe to your home.
Are DIY Decorations Worth the Time and Effort?
Absolutely! DIY decorations not only save you money but also allow you to personalize your Halloween decor. Projects like miniature graveyards or floating ghosts provide creative outlets and can be a fun activity for families or friends.
Plus, making your own decor means you can reuse and adapt these items for future Halloween celebrations, making them a worthwhile investment of your time and effort!
What Are Some Quick Halloween Decor Ideas for Last-Minute Preparations?
If you’re short on time, quick ideas like witch hat door wreaths and spider web table runners can transform your space in minutes. Candle jars with spooky labels also add a festive touch without requiring much effort.
Even simple Halloween-themed throw pillows can instantly upgrade your living room with minimal fuss!
How Can I Involve My Family in Halloween Decor Projects?
Getting the family involved can make Halloween decor projects even more enjoyable! Host a pumpkin painting party where everyone can decorate their own pumpkins. You can also work together on ghostly garlands or DIY skull planters.
These activities not only create fun memories but also result in unique decorations that reflect your family’s creativity and spirit!