10 Mind-Blowing Acrylic Pouring Techniques You Must Try (Number 5 Will Leave You Speechless!)
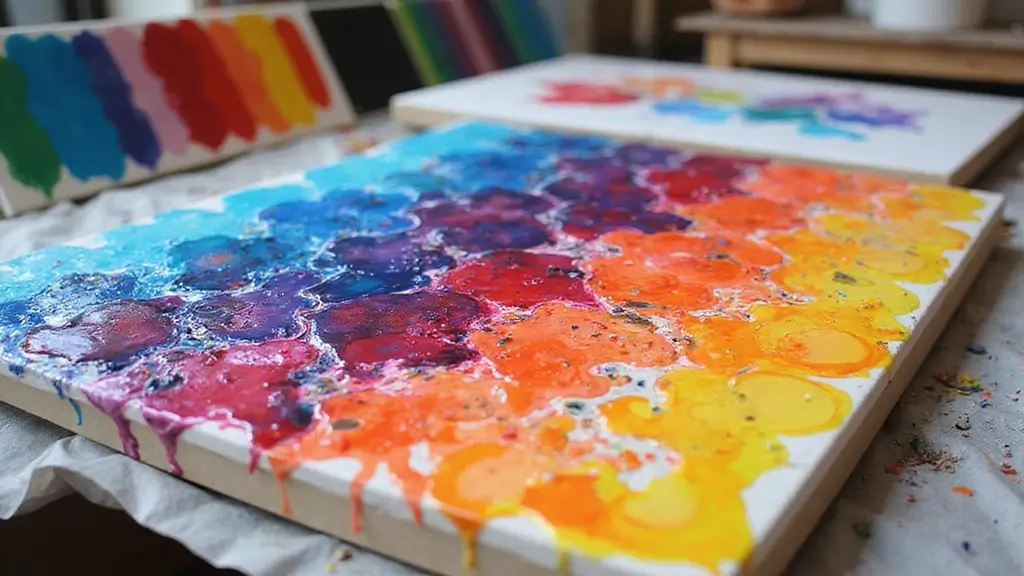
Acrylic pouring is one of those mesmerizing art forms that can transform a blank canvas into a vibrant explosion of colors.
The beauty lies in the unpredictability of fluid art, where each pour yields unique results, making every piece a one-of-a-kind creation.
Whether you’re a seasoned artist looking to explore new techniques or a curious beginner eager to dive into the world of acrylic pouring, you’re in for a treat! Let’s dive into 10 incredible techniques that will blow your mind and inspire your next art session.
1. The Classic Flip Cup

The Flip Cup technique is a classic for a reason! It’s simple yet yields stunning results that can truly delight. To start, layer your acrylic paints in a cup, with the most dominant color at the bottom. For this, consider using the ARTEZA acrylic pouring paint set, which offers a fantastic assortment of high flow colors perfect for pouring on various surfaces.
Next, pour in some pouring medium, like the Floetrol for acrylic paint pouring medium, to achieve that silky texture you desire. Once your cup is filled, place it upside down on your canvas and slowly lift it off. Watch as the colors flow and blend together in a mesmerizing display. Each flip creates unpredictable patterns that can truly captivate onlookers.
For your canvas, opt for the KEFF canvas panels for painting, which are perfect for a variety of acrylic projects. Experiment with the amounts of paint and pouring medium for varied effects. Let the colors sit slightly before flipping for a more marbled look, and don’t be afraid to tilt your canvas to see how the colors interact!
Trying the Flip Cup will surely add excitement to your acrylic pouring adventures.
2. The Dirty Pour

If you want to create a multi-layered masterpiece without the fuss of multiple cups, the Dirty Pour is your go-to technique.
This method involves pouring multiple colors into a single cup, letting them layer but not mix too much. When you pour it out, the colors will blend beautifully but retain their individuality, giving you stunning results. To get started, consider using an acrylic paint set that offers a variety of colors. With 24 rich pigments at your disposal, you can create striking contrasts that enhance the drama of your artwork.
Pro Tips:
– Use contrasting colors for a more dramatic effect.
– Start with a base color on the canvas, which you can achieve beautifully on canvas panels, to create depth.
– Tilt and turn the canvas to manipulate how the paint flows, ensuring a captivating final product.
To get the best results, don’t forget to incorporate a good pouring medium. This will help your paints flow smoothly, allowing the colors to interact beautifully and achieve that characteristic Dirty Pour effect. What’s great about this technique is its ability to surprise you with each creation, making every piece feel fresh and unique.
3. The Tree Ring Pour

Get ready to create stunning patterns with the Tree Ring Pour technique!
This method involves pouring paint in a circular motion from the center outward, mimicking the rings of a tree. Start with a base color, then choose your additional colors and pour them one at a time in a circular motion. The result is a radial pattern that can resemble delicate flowers or mesmerizing whirlpools.
To help you master this technique, consider using squeeze bottles for paint. These easy squeeze writer bottles offer you more control over your pours, ensuring precision as you layer your colors. Speaking of colors, an acrylic paint set with a variety of options can help you achieve the contrasting effects that make your artwork pop. Finally, make sure you have a solid surface to work on, such as canvas panels for painting. These primed canvases are perfect for acrylic pours, providing a great foundation for your enchanting designs.
The Tree Ring Pour is all about precision and practice, but with the right tools and dedication, the results are nothing short of magical!
Create your own masterpiece with the Tree Ring Pour! This technique transforms simple pours into stunning, nature-inspired art that’s sure to impress. Let your creativity flow and watch as each ring tells a unique story!
4. The Swipe Technique

Swipe technique is perfect for creating dramatic and flowing designs!
To achieve this look, start by pouring different colors onto your canvas. Using a tool like a palette knife set or a piece of cardstock, swiping across the paint creates beautiful cells and blended areas that resemble abstract landscape paintings. This technique is all about movement; you can create waves, skies, or abstract designs.
For successful swiping, consider these tips:
– Experiment with the angle and pressure of your swipe for variation.
– Dampen your swipe tool for smoother blends.
– Let the colors move and mingle for unexpected results.
To enhance your acrylic pouring experience, check out the acrylic pouring paint set that includes 32 assorted colors, ensuring you have a vibrant palette to choose from. And don’t forget to get some canvas panels for painting, which provide a solid foundation for your artwork. The Swipe Technique can easily bring a bit of drama to any acrylic pour!
5. The String Pull

Prepare to be amazed by the String Pull technique! This method combines elegance and creativity for jaw-dropping results.
Start by pouring your base colors onto the canvas using an acrylic paint set. With 24 rich colors at your disposal, you can mix and match for stunning contrasts. Once your base is ready, take a string (or even a piece of heavy yarn) from a DIY string art kit to add intrigue to your project. Dip it into a contrasting color and gently lay it across your base.
When you pull the string, it drags the paint along with it, creating stunning lines and patterns. The thickness of the string can yield different effects, making experimentation essential. Don’t forget to try looping the string back to create intricate designs.
To support your painting journey, consider using canvas panels that are 100% cotton and primed, perfect for acrylic pouring. This technique is functional and an artistic journey that’ll surely leave you in awe!
6. The Balloon Smash

If you love texture, the Balloon Smash technique is your best friend!
This playful method involves applying paint to the canvas and then using a partially inflated balloon to create texture. Dip the balloon in paint and press it onto your canvas. As you lift it, it leaves a unique pattern that can mimic bubbles, flowers, or abstract shapes.
To get started, consider using an acrylic paint set with a range of vibrant colors. The rich pigments will create stunning impressions on your canvas. You’ll want to use thicker paint to achieve better impressions, and this set provides a quality that’s perfect for the Balloon Smash technique.
Don’t forget about the balloons! A pack of assorted balloons will allow you to experiment with different sizes for diverse patterns. The variety of colors will add an exciting flair to your artwork, ensuring that your creations stand out.
Lastly, having the right surface to work on is important. Consider using canvas panels for your projects. These primed painting canvases are specifically designed for acrylic pours and will enhance the overall texture of your work.
The Balloon Smash technique can turn any acrylic pour into a tactile masterpiece!
Unleash your creativity with the Balloon Smash technique! A simple balloon can transform your canvas into a textured masterpiece, making every stroke an adventure in acrylic pouring. Embrace the unexpected!
7. The Acrylic Pour with a Twist

Want to add a twist to your acrylic pouring? Try combining different techniques in one artwork!
You can start with a Dirty Pour and then enhance it using the Swipe Technique or Balloon Smash over it. To achieve the best results, consider using the ARTEZA acrylic pouring paint set that includes 32 assorted colors, perfect for creating vibrant layers in your art. Mixing techniques can lead to innovative and unique outcomes, allowing endless possibilities for creativity. The layers of different textures and colors will bring depth and excitement to your work.
To help create those stunning cells, don’t forget to incorporate some silicone oil for acrylic pouring. This dramatic cell activator is compatible with all painting mediums, providing that beautiful visual effect you desire.
Here are a few suggestions to keep in mind:
– Plan your colors ahead to create a cohesive look.
– Don’t rush; let each layer dry before applying the next for cleaner lines. Using an acrylic pouring tools kit can make this process easier, as it includes all the essentials like pouring medium and mixing sticks to help you along the way.
– Keep an open mind; the beauty of fluid art is its unpredictability!
This technique is perfect for those who want to explore and create something truly original!
8. The Negative Space Technique

### 8. The Negative Space Technique
Embrace the beauty of negative space with this creative pouring technique! Start by pouring colors around an area where you want to leave blank or unpainted. This allows your focal point to stand out while still showcasing the vibrant pour. It’s a fantastic way to draw attention to specific elements in your artwork, allowing the colors to shine around it.
To achieve stunning results, consider using an acrylic paint set which includes 24 rich colors that can help you create that striking focal area. This variety will not only make your artwork pop but will also enhance the visual interest of your composition.
In addition, a high-quality pouring medium can improve the flow consistency of your paints, making it easier to pour around your negative spaces without the colors blending too much. This ensures that your vibrant hues stay separate and maintain their intensity.
Pro Tips:
– Choose a striking color for your focal area to make it pop.
– Consider symmetry and balance when deciding where to leave negative spaces.
– Use a variety of colors to enhance visual interest.
For an added touch, using silicone oil for acrylic pouring can help create dramatic cell effects around your negative spaces, giving your artwork a unique and dynamic look.
The Negative Space Technique adds sophistication to your acrylic pours, letting them breathe and shine!
9. The Lacing Effect

Create mesmerizing designs with the Lacing Effect!
This unique technique involves using silicone oil or a pouring medium to create cells that look like lace on your artwork. It’s all about the chemical reaction between your paints and the oil that creates rich textures and patterns. Pour your colors and add a few drops of Pebeo Studio Acrylic Silicone Oil, then tilt your canvas to let the colors move. Watch in wonder as the lacing forms!
For more defined cells, consider using a high viscosity paint, like the Shuttle Art Acrylic Paint Set, which features rich pigments and comes in large bottles, perfect for all your pouring needs.
Don’t forget to use a good pouring medium to enhance your results. The Apple Barrel Pouring Medium is great for this purpose, ensuring your paint flows smoothly and helps create those beautiful lacing effects.
Be cautious with the amount of silicone—too much can overpower the design. The Lacing Effect will elevate your acrylic pouring game to a whole new level!
Unlock the magic of acrylic pouring! A few drops of silicone can turn your canvas into a lacework of color and texture. Embrace the beauty of the unexpected!
10. The Marble Effect

Lastly, let’s explore the Marble Effect! This technique creates beautiful swirls and blends resembling natural marble.
To achieve this, pour your colors closely together on the canvas and use a stirring stick or a palette knife, like the palette knife set, to create those elegant swirls. The key is to move gently to maintain the definition between colors. With a little practice, you can create intricate marble patterns that are both captivating and sophisticated.
Suggestions:
– Use contrasting colors from the acrylic pouring paint set to make the marble effect truly stand out.
– Layering different shades of the same color can also create beautiful depth.
– Don’t overmix; the magic happens in those delicate swirls!
For the best surface to work on, consider using canvas panels for painting, which are perfect for showcasing your art.
The Marble Effect can bring a sense of sophistication to your acrylic pouring creations!
Unleash your creativity with the Marble Effect! Just a gentle swirl can transform your acrylic pouring into mesmerizing patterns that echo the elegance of nature.
Conclusion

These 10 acrylic pouring techniques are just a glimpse into the vibrant world of fluid art!
Each method offers its unique charm and allows for endless experimentation. Whether you’re drawn to the dramatic swirls of a Tree Ring Pour or the elegant patterns of the Balloon Smash, there’s no wrong way to express your creativity.
So gear up, grab your paints, and let the magic of acrylic pouring take over your canvas!
Note: We aim to provide accurate product links, but some may occasionally expire or become unavailable. If this happens, please search directly on Amazon for the product or a suitable alternative.
This post contains Amazon affiliate links, meaning I may earn a small commission if you purchase through my links, at no extra cost to you.
Frequently Asked Questions
What is acrylic pouring, and why is it so popular?
Acrylic pouring is a mesmerizing art form that transforms ordinary acrylic paints into vibrant, fluid masterpieces. Its popularity stems from the unpredictability and creativity it offers, allowing artists to explore colors and patterns without needing advanced painting skills. With various techniques to try, anyone can create stunning artworks that are as unique as they are beautiful!
Do I need special materials for acrylic pouring techniques?
While you can get started with basic acrylic paints and a canvas, some techniques may require additional materials like pouring medium, silicone oil for effects, or tools such as spatulas or balloons for texture. Investing in quality supplies can enhance your results, making your acrylic pouring experience even more enjoyable and rewarding!
How do I choose the right colors for my acrylic pouring project?
Choosing colors can be one of the most exciting parts of acrylic pouring! Consider using a color wheel to create complementary or analogous color schemes for harmonious effects. Don’t be afraid to experiment with bold contrasts or subtle blends to discover what resonates with you. Remember, each pour is a chance to explore your creativity!
Can I fix mistakes in my acrylic pouring artwork?
Absolutely! One of the joys of acrylic pouring is that it’s very forgiving. If you make a mistake or don’t like a section, you can either pour another layer of paint over it or use techniques like the Swipe Technique to create new designs. Embrace the imperfections—they often lead to beautiful surprises!
How long does it take for acrylic pouring projects to dry?
Drying time can vary based on the thickness of the paint and the environment. Typically, a poured piece can take anywhere from 24 to 72 hours to dry completely. Make sure to let it cure in a safe space, away from dust and debris, to preserve the beauty of your artwork. Patience is key to achieving stunning results!